Get the Perfect Shade at Home
Tinting your brows at home can feel like a mini spa session in your bathroom. You save time, spend less and get to control the exact shade. Whether you’re a total beginner or a seasoned DIY enthusiast, a professional brow kit can make all the difference. With the right tools and a clear step-by-step plan, you’ll achieve that salon-fresh look in minutes.
In this guide we’ll cover everything from choosing the right dye to maintaining your arches between tints. We’ll also flag the signs that it’s time to book a professional appointment at Rejuvenate Spa. Ready for brows that wow? Explore our professional brow kit for perfect arches.
Step-by-Step: DIY Brow Tinting at Home
Tinting your brows isn’t rocket science, but there are a few tricks that pros swear by. Grab your professional brow kit and let’s dive in.
1. Pick Your Perfect Dye
Finding the right hue is crucial. Too dark and you’ll look startled. Too light and it defeats the purpose.
- Test shades on a paper towel first.
- Hold the paper above your brows to preview the colour.
- Stick to one or two shades darker than your natural brows.
Pro tip: Always do a patch test 48 hours before dyeing to rule out any allergy.
2. Create a Drip-Proof Barrier
No one wants dye streaks on the surrounding skin.
- Apply a thin layer of petroleum jelly around your brow area.
- Avoid getting jelly on the brow hairs themselves.
- Make sure skin is totally dry before you start.
3. Mix Dye and Developer
Your professional brow kit likely has a little tray with two compartments. Here’s how to get the consistency just right:
- Squeeze the colour base into one side.
- Add the developer in equal measure on the other.
- Mix gently with the brush until smooth and even.
4. Application Technique
Precision matters more than speed here.
- Use the angled brush from your kit.
- Start with the tail of the brow and work towards the head.
- Apply extra dye on any sparse spots for more coverage.
5. Time It and Wash Off
Set a timer. Five minutes is usually spot on. Too long can look harsh; too short might not show at all.
- Rinse with a damp cloth and a dab of gentle shampoo.
- Pat dry—do not rub.
Follow these steps and your DIY tint will last about two weeks. Not bad for a 10-minute routine.
Maintaining Your DIY Tint
Once you’ve nailed the process, it’s all about upkeep. A few simple habits keep your brows looking lush in between tints.
- Nightly care: try castor oil for conditioning.
- Avoid harsh cleansers on the brow area.
- Brush brows daily to stimulate hair growth.
If you want an extra boost, consider adding our range of Dr.Babor and SkinCeuticals to your nightly routine. Discover our skin products to elevate your brow care
When to Seek Professional Brow Tinting
DIY can be fun and wallet-friendly, but there are times when you need a pro touch. Here’s how to know when to book at Rejuvenate Spa.
- You want a custom shade matched to your hair and skin tone.
- You’ve had DIY mishaps like uneven colour or staining.
- You need both hair and skin tinting for a fuller effect.
- You’d like extra grooming services such as waxing or threading.
At Rejuvenate Spa our specialists use the latest techniques to give you a balanced, long-lasting result. Plus, you’ll unwind in our serene wellness centre right here in Chevy Chase. When you’re ready for that flawless finish, we’re here for you. Ready to upgrade your routine? Check out our professional brow kit.
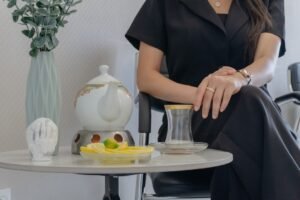
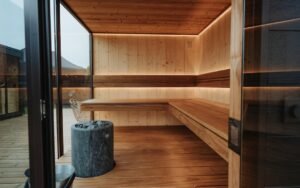
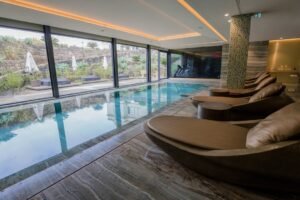
Why Choose Rejuvenate Spa in Chevy Chase
Rejuvenate Spa Services brings a holistic approach to brow tinting. It’s not just about colour. It’s about the experience.
- Highly trained professionals blend modern and traditional techniques.
- Enjoy a calm environment designed for ultimate relaxation.
- Combine your brow tint with a soothing facial or a therapeutic massage.
- Benefit from loyalty programmes and special packages.
For instance, our massage treatments and hydrafacial services pair beautifully with brow tinting for a full-face rejuvenation experience. Book a hydrafacial or massage treatment today
Bonus Tips: Beyond Tinting
A great tint deserves great care. Here are a few aftercare pointers that pros use:
- Avoid swimming or heavy sweat for 24 hours.
- Skip chemical exfoliants around your brow area.
- Use a brow brush to keep hairs in place.
- Schedule touch-ups every two to three weeks.
If you’re curious about more advanced skin or hair removal services—like pico laser or micro needling—our med spa has you covered. Explore our med spa service for refined brows and skin
Testimonials
“I struggled with patchy DIY results until I tried Rejuvenate Spa’s tint service. My brows have never looked fuller or more natural.”
— Emily R.
“The team matched my brow colour perfectly, and the spa ambience is so calming. I always add a facial treat after my tint.”
— Marcus L.
“I love being able to DIY my tints, but sometimes I crave that professional shine. Rejuvenate Spa never disappoints.”
— Sophia K.
Gift the Gift of Perfect Brows
Looking for a thoughtful present? A gift card to Rejuvenate Spa is a treat for any beauty lover. They can choose brow services, facials or even acupuncture. Surprise them with a gift card today
Conclusion
DIY eyebrow tinting can be fun, quick and cost-effective—especially when you use a reliable professional brow kit. But when you need precision, a custom colour or a soothing atmosphere, Rejuvenate Spa in Chevy Chase is your go-to. Ready to transform your arches with ease? Transform your arches with our professional brow kit